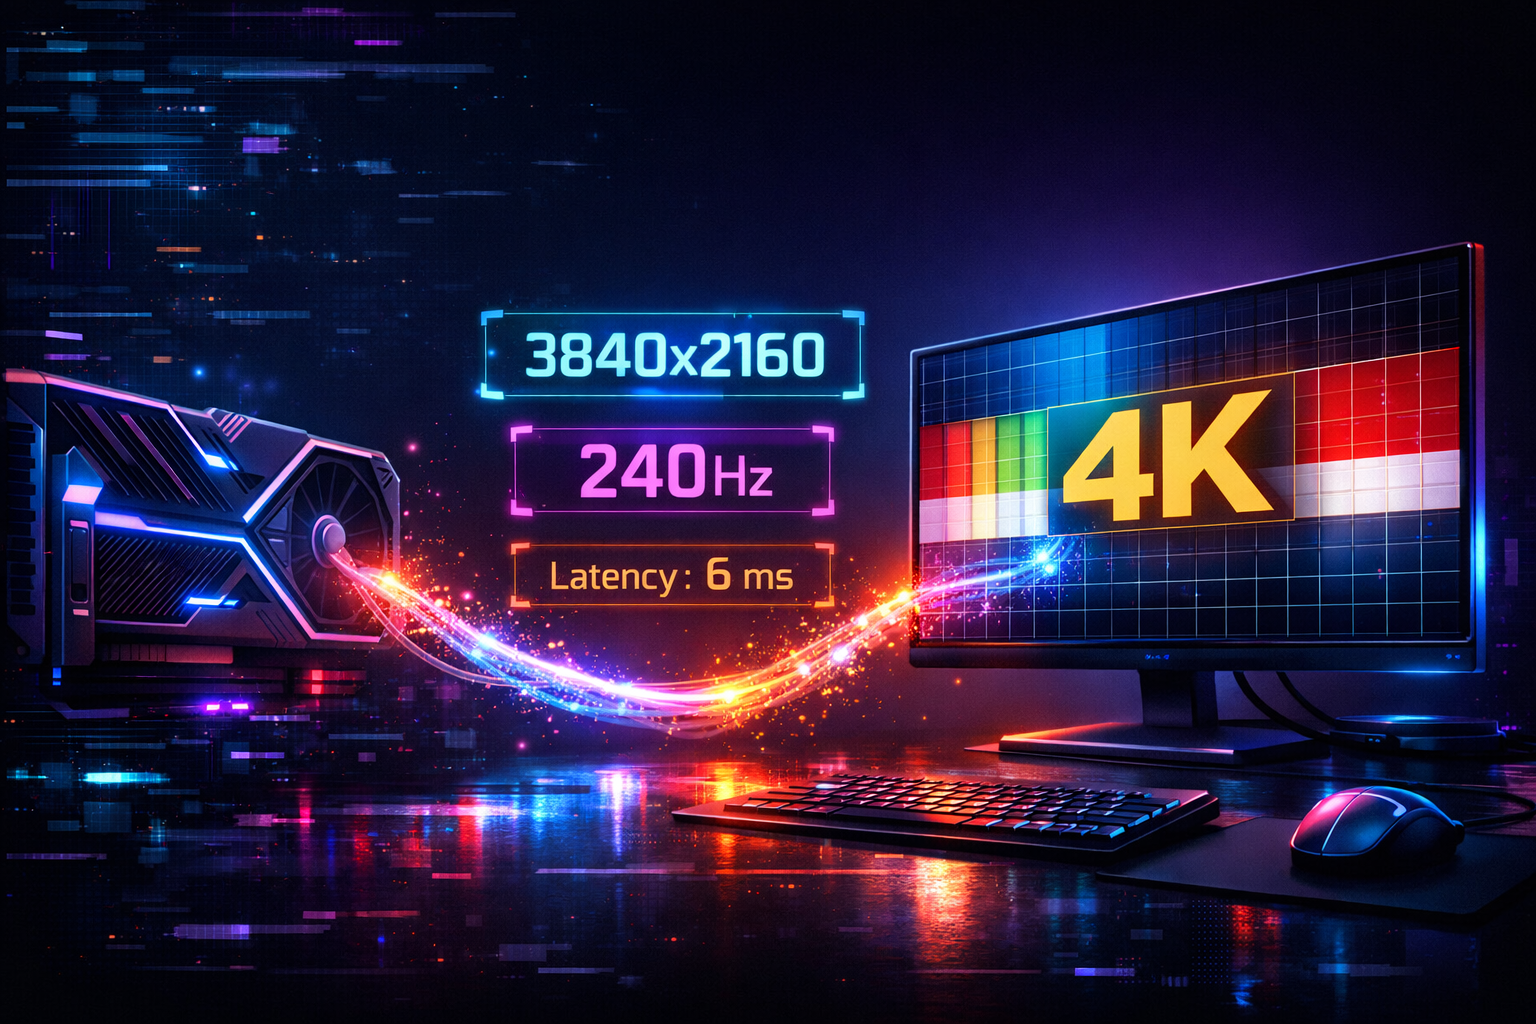
You can spend a fortune on an RTX 5090 and a 4K “gaming” display, and still not be running:
- True 3840×2160
- At the panel’s full 120–144 Hz
- With VRR and low latency
Why? Because out of the box, Windows, your monitor/TV and your GPU all make “safe” assumptions. That often means:
- 4K running at 60 Hz
- VRR turned off
- TV stuck in a cinema preset with motion smoothing
- Windows using the wrong scaling or an intermediate resolution
This guide walks you through, step-by-step, how to make sure your RTX 5090 and 4K panel are genuinely talking at the right resolution and refresh rate with minimal latency – the way you think they are.
Perfect as a support pillar for your main optimisation guide on rtx50series.co.uk.
Know What Your 4K Panel Can Actually Do
Before you start poking settings, you need to know what you should be aiming for.
Check the real specs – not just “4K”
Look up your monitor or TV’s product page (or the box) and confirm:
- Resolution: 3840 × 2160 (4K UHD)
- Maximum refresh:
- 60 Hz (budget 4K displays / older TVs)
- 120 Hz (most modern gaming TVs and many 4K monitors)
- 144 Hz (high-end gaming monitors and a few TVs)
- Ports and standards:
- For monitors: DisplayPort 1.4 / 2.1, HDMI 2.0 / 2.1
- For TVs: HDMI 2.1 ports for 4K 120 Hz and VRR
Modern HDMI 2.1 gaming TVs from brands like LG and Samsung support 4K 120 Hz, VRR (FreeSync / G-Sync), ALLM/Game Mode and low input lag on specific HDMI 2.1 ports.
High-end 4K gaming monitors often lean on DisplayPort 1.4 or newer to deliver 4K 120–144 Hz, sometimes using DSC (Display Stream Compression) for the highest modes.
If the display only does 4K 60 Hz, your optimisation target changes – you’ll focus more on stable 60 FPS with perfect frametimes. But if the spec sheet says 4K 120 or 144 Hz, you should absolutely be using that with an RTX 5090.
Use the Right Port and Cable on the RTX 5090
You want the cleanest, highest-bandwidth path between GPU and screen.
For 4K monitors: prefer DisplayPort
On a 4K gaming monitor, the ideal path is usually:
- DisplayPort 1.4 / 2.1 from RTX 5090 → monitor DisplayPort
Why?
- DP 1.4 can handle 4K 120 Hz+ with HDR and VRR on modern cables and panels, often even 4K 144 Hz with DSC.
- DP is designed for PC monitors, with robust support for high refresh and VRR.
Use:
- A short, good-quality DisplayPort cable explicitly rated for high refresh 4K.
Avoid:
- Old, unknown DP cables you’ve had in a drawer for years – many are only guaranteed for lower bandwidths.
For 4K TVs: use HDMI 2.1 into the right port
On a 4K TV, you’ll almost always use HDMI:
- Plug from RTX 5090 HDMI 2.1 → TV HDMI 2.1 port that supports 4K 120 Hz + Game Mode + VRR (check the manual; often only 1–2 ports do it).
Use a certified Ultra High Speed HDMI 2.1 cable, especially if:
- You want 4K 120 Hz with HDR and VRR
- The cable run is longer than ~2 m
- You see flicker or dropouts at high refresh
Keep the chain simple
While you’re tuning:
- Avoid running through AV receivers, cheap HDMI switches or capture cards
- Go RTX 5090 → display directly
Once you’ve confirmed stability at 4K high refresh, you can reintroduce other devices if they support the same bandwidth.
Fix Windows Display Settings: Native 4K and Max Refresh
Even with perfect cabling, Windows often defaults to 4K 60 Hz or worse.
Set native 4K resolution
On the desktop:
- Right-click → Display settings
- Under Scale & layout, set Display resolution to 3840 × 2160 (Recommended)
If you see anything like 2560×1440 or 1920×1080, you’re not running true 4K – the GPU is upscaling or the OS is stuck in a lower mode.
Scaling:
- Set Scale to 150–200% if text is tiny – this doesn’t hurt in-game performance, it just changes desktop UI size.
Set the highest refresh rate
In the same Display settings page:
- Scroll down → Advanced display
- Under Choose a refresh rate, select the max:
- 120 Hz or 144 Hz (for high-refresh panels)
- Confirm that Active signal resolution also shows 3840 × 2160
If the dropdown only shows 60 Hz, something in the chain (port, cable, TV/monitor setting) is limiting you:
- Check you’re on the right HDMI/DP port
- Make sure the TV is in a PC or Game input mode
NVIDIA Control Panel: Make the RTX 5090 Drive the Panel Correctly
With Windows set to 4K and high refresh, you now want the RTX 5090’s output to match.
Confirm resolution, refresh and colour format
Right-click desktop → NVIDIA Control Panel:
- Go to Change resolution
- Select your main 4K display
Then:
- Resolution: 3840 × 2160
- Refresh rate: 120 Hz or 144 Hz, matching the panel
- Output colour depth: typically 10-bit for HDR, 8-bit for SDR if 10-bit causes bandwidth issues
- Output colour format: usually RGB Full or YCbCr 4:4:4 for PC use
If you can’t select your target refresh here, it’s either:
- The wrong port / cable
- A panel limitation
- A TV mode that doesn’t allow high refresh on that input
Enable G-Sync / G-Sync Compatible (VRR)
Still in NVIDIA Control Panel:
- Go to Set up G-Sync
- Tick Enable G-Sync, G-Sync Compatible
- Select your 4K monitor or TV
Many HDMI 2.1 TVs now support VRR over HDMI and are marketed as G-Sync Compatible or FreeSync, meaning RTX cards can use VRR for smoother, tear-free gameplay.
This is key for smoothing out frame rate fluctuations at 4K.
Choose a sync strategy that matches your goals
Two reliable patterns for 4K RTX 5090 setups:
Option A – Smooth, tear-free 4K
- VRR: On (G-Sync / G-Sync Compatible)
- In NVIDIA Control Panel: V-Sync: On
- In games: V-Sync: Off
- Use an FPS cap 2–3 FPS below refresh (e.g. 117–118 FPS on 120 Hz, 140–141 on 144 Hz)
Option B – Latency-first, “raw” feel
- VRR: On
- V-Sync: Off in driver and in-game
- Use an FPS cap to avoid wild spikes
For most single-player and “hybrid” 4K setups, Option A gives a gorgeous, consistent feel. For pure competitive play, Option B can feel fractionally more responsive at the cost of occasional tearing.
TV-Specific Tweaks: Game Mode, Motion Smoothing and Processing
If your 4K panel is a TV, it’s almost certainly doing lots of video processing designed for films – which is terrible for 4K 120 Hz PC gaming.
Turn on Game Mode on the correct HDMI port
On your TV:
- Open Picture or General settings
- Find Game Mode / Game Optimiser / ALLM
- Enable it on the HDMI input your RTX 5090 is using
Modern HDMI 2.1 gaming TVs offer Game Mode with 4K 120 Hz, VRR (FreeSync/G-Sync compatible) and very low input lag (often under 10 ms) when configured correctly.
Game Mode typically:
- Disables most heavy post-processing
- Allows 4K 120 Hz + VRR
- Dramatically cuts input lag
Disable motion smoothing and extra “cinema” effects
Look for and turn off:
- Motion smoothing / TruMotion / MotionFlow / “Auto Motion Plus”
- Noise reduction / MPEG noise reduction
- Dynamic contrast, over-aggressive local contrast modes
- Over the top “live colour” and similar
These features:
- Add processing delay
- Can interfere with VRR
- Make games look soap-opera smooth and smear fine detail
Your RTX 5090 is already producing high-refresh 4K frames – you don’t need the TV making fake ones.
Minimising Latency Between RTX 5090 and Panel
Once resolution and refresh are correct, you want to trim input lag end-to-end.
Windows + NVIDIA latency settings
In Windows:
- Turn Game Mode ON
- Consider enabling Hardware-Accelerated GPU Scheduling (HAGS) and test; keep it if it improves smoothness and latency for you.
In NVIDIA Control Panel:
- Low Latency Mode → On globally, and Ultra for GPU-bound games where you want the snappiest feel
In supported games:
- Enable NVIDIA Reflex → On or On + Boost for further latency reductions.
Keep the signal path as clean as possible
For lowest practical latency:
- Avoid daisy-chaining through capture cards or old receivers when you’re playing seriously
- Use the GPU’s direct output into the display’s best input (DP for monitors, HDMI 2.1 for TVs)
- Avoid running the signal through USB-C docks unless they explicitly support the required bandwidth
Quick Testing Checklist: Are They Talking Properly?
After setting everything up, run through this mini checklist:
- Desktop resolution
- Windows shows 3840 × 2160
- Scaling is 150–200% (personal preference; doesn’t affect in-game res)
- Refresh rate
- Advanced display settings show 120 or 144 Hz for the main display
- NVIDIA Control Panel also shows that refresh rate selected at 4K
- VRR / G-Sync
- G-Sync / G-Sync Compatible enabled in NVIDIA Control Panel
- On TV: VRR and Game Mode enabled on the right HDMI port
- In-game
- Resolution set to 3840 × 2160
- FPS overlay shows frame rate capped just below refresh
- No obvious tearing; frametime graph mostly flat
- Latency feel
- Mouse or controller feels tight and immediate
- No obvious “soap opera” motion or smearing from TV processing
If all of that checks out, your RTX 5090 and 4K panel are now genuinely talking at the right resolution and refresh rate with minimal latency. From here, you can focus on game-by-game optimisation (DLSS mode, RT quality, shadows, etc.) knowing the display chain is solid.
One thought on “RTX 5090 + 4K Display: How to Make Sure They’re Actually Talking at the Right Resolution, Refresh Rate and Latency”